Tuesday, October 31, 2017

You're Boo-Tastic

Are you ready for Halloween? This is our first in the new neighborhood and since there are a lot of children here and the next neighborhood I am expecting quite a few trick or treaters. At least I hope so because I have bought a lot of candy! I buy the good kind too so it's not given away guess who will be eating it?

Sadly I have only made a couple of Halloween cards this year including the one I am showing you today. Even more disappointing, I haven't mailed any either. This holiday just always seems to sneak up on me.


I combined the Pretty Pink Posh Storybook die with an MFT stitched rectangle die to cut a cover from Orange Zest cardstock, stamping the sentiment onto it from the Mama Elephant Bootastic set  using black ink. The inserts were cut from patterned paper and Neenah cardstock. I stamped the bats from the same set onto the patterned paper. the Mummy and Vampire images were stamped onto the white cardstock and colored with with Copic Markers.

Products: Mama Elephant stamps, Pink Paislee dp, Neenah, MFT and PTI cs, Pretty Pink Posh and MFT die, MFT and Simon Says ink, Copic Markers
Copics: Mummy-E0000, E000, E00, R20, W00, E81; Vampire-E0000, E000, E00, R20, N1, N3, N5, YR01, YR12, YR14, C00, C1, C3, C5, W00, E81; Shadows-C00, C1


Happy Halloween!

 photo signaturecopy_zpsn7wywovz.png

Tuesday, October 24, 2017

Hi, Friend

Today's tag/card was an exercise in not only using a new stamp and die set but to also get away from the Christmas and Fall colors I have been using a lot lately. Don't get me wrong. I do love the colors associated with both but it was refreshing to use other colors for this project.


I actually created this for the Tag You're It #75 challenge although I certainly strayed far from the inspiration tag theme. But I was inspired by the stitched edge tag as well as the direct to paper stamping. I used the new Essentials by Ellen Snailed It set because a) it's new and b) it's cute. After cutting the tag from white card stock using a Pretty Pink Posh Stiched Duo 3 die, I stamped the leaf stem in green parakeet then inked the edges of the stamp with new leaf ink and stamped again to give it a some depth and shading. Using a bit of masking I also stamped the mushrooms with pale tomato and catkin inks as well as the snail trail with smoke ink. I stamped the snail parts separately using bright buttercup and soft granite ink, then cut out with the matching dies. Lastly I stamped the sentiment directly on the tag using soft granite ink again. I fully intended on using some yellow ribbon in the tag hole but when searching for said ribbon I ran across the black and white snippet and decided to use it instead for some contrast.


I decided to go ahead and add to a card while I was working on it. I cut the card front from Essentials by Ellen card stock and added a patterned paper and strip of card stock border at the bottom of a top folding card. I attached the completed tag using a layer of craft foam.

Products: Essentials by Ellen stamps and dies, Studio Calico dp, Essentials by Ellen and PTI cs, Pretty Pink Posh die, PTI, Simon Says and Hero Arts ink

I hope your week is off to a good start. Later.

 photo signaturecopy_zpsn7wywovz.png

Thursday, October 19, 2017

Hello Pumpkin

I have been a bit spendy lately with my crafty supplies yet have barely had the time to touch them. I am trying to get a few of them out of the new box in between design team assignments. I am entering today's card in the Simon Says Wednesday Challenge which is Fall/Halloween photo inspired.


We don't get much of an autumn around here but that doesn't mean I don't like to make fall themed cards. I couldn't resist the Hello Pumpkin set which is a Neat and Tangled and Simon Says collaboration. I first prepared the background by using Fossilized Amber and Spiced Marmalade distress oxides ink onto a watercolor rectangle. I loosely added water with a wet brush and then cut it with a wonky stitched rectangular die after it dried. I stamped the various images onto Neenah card stock, cut out with the matching dies and then colored with Copic Markers. I stamped the candied apple image onto Copics X Press It and after coloring I fussy cut the apple portion out. I stamped the image directly onto the background again so I would not have to fussy cut out the stick. After stamping the sentiment,  I attached the images using a combo of glue and foam tape for dimension.

Products: Neat and Tangled/Simon Says stamps and dies, Ranger, Neenah and PTI cs, MFT, Simon Says and Ranger Distress Oxide ink, Copic Markers
Copics: Bear-E31, E33, E34, W00, E81, R11; Mouse-C00, C1, C3, R11; Scarves-B0000, B000, B01, B05, G21, G24; Pumpkin-E97, E99, E15; Stump-E40, E41, E44, W2, E33; Mushroom-R00, R01, R05, W00, E81; Apple-R20, R22, R24, E21,E23

Happy Fall Y'all!


 photo signaturecopy_zpsn7wywovz.png

Monday, October 16, 2017

The Cat's Pajamas October Release Blg Hop and TCP Tuesday


It is release day for The Cat's Pajamas! Four new stamp and three new die sets are now available in The Cat's Pajamas shop. We are celebrating the release with a blog hop. If you arrived here from one of our new Cat Pack members Michele's blog you are right on track. If not start at the beginning at Brenda's blog.


We are also right in the middle of TCP Tuesday #340 Challenge which is to add some sparkle to your project.


I used the outer die from the Holiday Window Duos die to cut from white and sno cone card stock for an inlaid look. I stamped the image from the Reindeer set onto the white portion and colored with Copic markers. I added a touch of sparkle to the ornaments with a clear gelly roll pen and some highlights to the reindeer with a white gelly roll pen.  The sentiment was stamped with Versamark and silver heat embossed. I cut the gifts from card stock and patterned paper and the bows from silver metallic paper using the Presents die set.

Products: The Cat's Pajamas stamps and dies, Doodlebug dp, MFT, PTI and Neenah cs, Michael's mettalic cs, Stampendous embossing powder, Versamark and Memeno ink, Copic Markers
Copics: Reindeer-W00, W1, W2, W5, E31, E33, R20, R22, R24, R27, E81; Ornaments-B0000, B000, B01, R22, R24, R27, YG21, YG13; Box-W00, E81; Shadows-BG0000, BG000, BG70

That's it from me. Check out all the details regarding this release at The Cat's Pajamas blog. Your next stop on the hop is the oh so creative Wendy.

Here is the full blog hop lineup:

Brenda
Deborah
Michele

Nancy (You are here)
Alma@The Cat’s Pajamas

 photo signaturecopy_zpsn7wywovz.png

Monday, October 9, 2017

The Cat's Pajamas October Sneak Peeks


Welcome to the The Cat's Pajamas Sneaky Peek Week! We have four new stamp sets and three new dies which will be released on October 17 in the TCP store. I am kicking off the first of seven days of Sneaky Peek week. Each member of the design team will be taking turns sharing creations so be sure to stop by The Cat's Pajamas blog everyday to see who is on the schedule. I know that I have said this before but this is my very favorite release and I think you will agree when you see the projects throughout the week.


My first card features the new Fat Cat Christmas set which is hilarious. Just perfect for those one of kind Christmas cards. I stamped one of the fat cats, colored with Copic Markers and then fussy cut out, adding Liquid Applique on the Santa hat. I cut off the bow on the gift box and replaced it with a bow cut from red card stock using one of the dies from the also new Presents CutUps set. I prepared the card background using the Dots CutUps to emboss the card front. I then used one of the dies from the Hill and Dale CutUps and He Said, She Said to cut from patterned paper, then stamped the sentiments on them. The stamped image was attached with foam tape.

Products: The Cat's Pajamas stamps and dies, Doodlebug dp, PTI cs, Marvy Liquid Applique, MFT and Simon Says ink, Copic Markers
Copics: Cat-YR30, YR31, YR23, N1, N3, N5, W00, E81, R20, R22, R24, R27; Package-W00, E81, R22, R24, R27, YG21, YG13, YG23


I have never been a big fan of nutcrackers but in cute bunny form I might change my mind. I mean, how could I resist this little guy from the new Christmas Dreams set? My biggest decision here was to give him pants or not?! I decided for a no pants look and after coloring the image up with Copic markers, I fussy cut out. I created a shaker tag by cutting a window from white woodgrain embossed card stock using a die from the brand new Window Duos CutUps. I stamped the sentiment using pure poppy ink and then filled the individual shaker window panes with sequins matching the bunny's outfit. The bunny was attached to the fourth pane with foam tape.

Products: The Cat's Pajamas stamps and dies, PTI and Ellen Hutson cs, Doodlebug sequins, MFT and PTI ink, Copic Markers
Copics: Bunny-E40, E41, E42, R20, W00, E81; Clothing-R22, R24, R27, B41, B32, B45, G40, G43, G46


My next card features an image from the new We 3 Snowmen set that I cut out with a pierced circle die and then colored with Copic markers. To prepare the background I just added a strip of patterned paper and wrapped red twine around the card front and tied in a bow. The sentiment was stamped directly onto the card front with pure poppy ink

Products: The Cat's Pajamas stamps, Doodlebug dp, PTI cs, The Twinery twine, Sakura Gel pen, MFT and PTI ink, Copic Markers
Copics: Snowman-G0000, G000, YR01, YR12, C00, C1, C3, C5, C7, YG21, YG13, YG23, R22, R24, R27, W1, W2, BG000, BG01, BG05; Background-BG0000, BG000


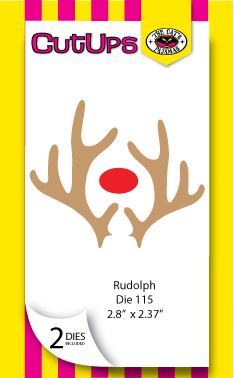
My last card for today is mainly die driven. I used one of the dies from the Window Duos CutUps to cut corrugated card stock into a tag shape. I added the antlers and nose cut with the new Rudolph die set, attaching the nose with foam tape and a couple of glitter enamel dots for the eyes. I stamped the sentiment from the Believe set onto a fishtail banner shape using pure poppy ink and also cut another banner from patterned paper. I also cut the holly from two colors of green card stock and berries from red card stock using dies also from theWindow Duos CutUps set. I layered the leaves together shifting slightly for the lighter green to show underneath. After wrapping the sentiment banner with silver thread I attached the holly and berries. After attaching the banners to the tag shape, I added a few white highlights to the berries and the reindeer nose using a white gelly roll pen. The tag was attached to a woodgrain embossed panel.


Products: The Cat's Pajamas stamps and dies, Carta Bella dp, PTI, Michaels and Ellen Hutson cs, Doodlebug enamel dots, PTI ink


For a chance to win a $10 gift certificate to the store, comment on each of the designer's blogs on a daily basis including mine today and also on my Instagram account @nancyhthomas. Winners will be announced on The Cat's Pajamas Blog and Facebook page each day. Tomorrow we will double your creative pleasure with not one but two Cat Pack members showcasing their talent tomorrow Michele and Lynn. You can always check the  TCP blog to see who is scheduled each day.


Here are all the new products I used today:


 photo signaturecopy_zpsn7wywovz.png

Saturday, October 7, 2017

With Graditude {Happy World Card Making Day}

I recently commissioned a painting from a wonderful artist from my church. She finished it up for me in record time so I am popping this in the mail today.


I stamped the larger leaf twice and the smaller one once from the Altenew With Gratitude set onto watercolor card stock with Versamark ink and heat embossed them all with Egyptian gold powder. After cutting them out with the matching dies I watercolored all three with Daniel Smith watercolors. I cut the woodgrain embossed card stock with a stitched rectangle and attached the leaves in a cluster. The sentiment was stamped onto another piece and after wrapping gold thread around it several times I attached it to the card front with foam tape. This is one of those cards I have to say is prettier in real life because my camera just could not pick up the sparkles from the embossing powder. Nor is the gold thread that dark. Unfortunately it is rather dark and gloomy around here ahead of Hurricane Nate bearing down on the gulf coast.

Products: Altenew stamps and dies, Ellen Hutson, PTI and Strathmore cs, MFT die, Versamark and MFT ink, Daniel Smith Watercolors
Watercolors: Pyrrol Scarlet, Quinacridone Gold and Ultramarine Turquoise


Happy World Card Making Day!

 photo signaturecopy_zpsn7wywovz.png

Monday, October 2, 2017

The Cat's Pajamas #340 Challenge


It's time for another TCP Tuesday challenge and it's a fun one. We are challenging you to add some sparkle to your project.


I stamped the ornament image from the Christmas Cookies set which was released last month using black ink and then cut it out with the matching die from the
Ornaments CutUps set.  To prepare the background I cut out a stitched rectangle from white linen card stock and then stamped the stars image twice from the Winter Style set using golden glitz ink to give it a bit of sparkle and shine. I also stamped a couple of the images from the Watercolor Basics set using the same golden glitz ink. The ornament was strung with gold thread and attached to the panel with foam tape. I added a snowflake cut from the Snowflake Lace Paper CutUps onto the ornament which I added a bit of sparkle with platinum stickles. A few sequins finished it up.

Products: The Cat's Pajamas stamps and dies, PTI cs, Verve sequins, Ranger Stickles, Simon Says and Delicata ink


Here are the details for the Challenge:
  • Each month a new challenge will be posted on The Cat’s Pajamas blog and our Facebook page.
  • If you want to play along you just upload your design to The Cat’s Pajamas blog page using the InLinkz button provided.
  • You are not required to use a Cat’s Pajamas stamp or die but if you have them we would love to see them.
  • On the day of the next challenge the winner will be chosen from the previous challenge and will receive a Cat Cash Voucher for $50.

 photo signaturecopy_zpsn7wywovz.png